RTPU Alarm Reset Procedure
How to identify, record, clear and verify alarms on rooftop package units fitted with the AIRSTAGE control interface or touchscreen controller.
Open MENU → ALARM STATUS → ACTIVE ALARMS, record the alarm, rectify the cause, then reset using RESET ALARMS or by holding ESC for 5 seconds. Confirm the alarm icon has cleared and normal operation has resumed.
Do not repeatedly reset an alarm without correcting the underlying fault. Repeated resets can lead to equipment damage and can mask a recurring system issue.
1. Identifying an Active Alarm
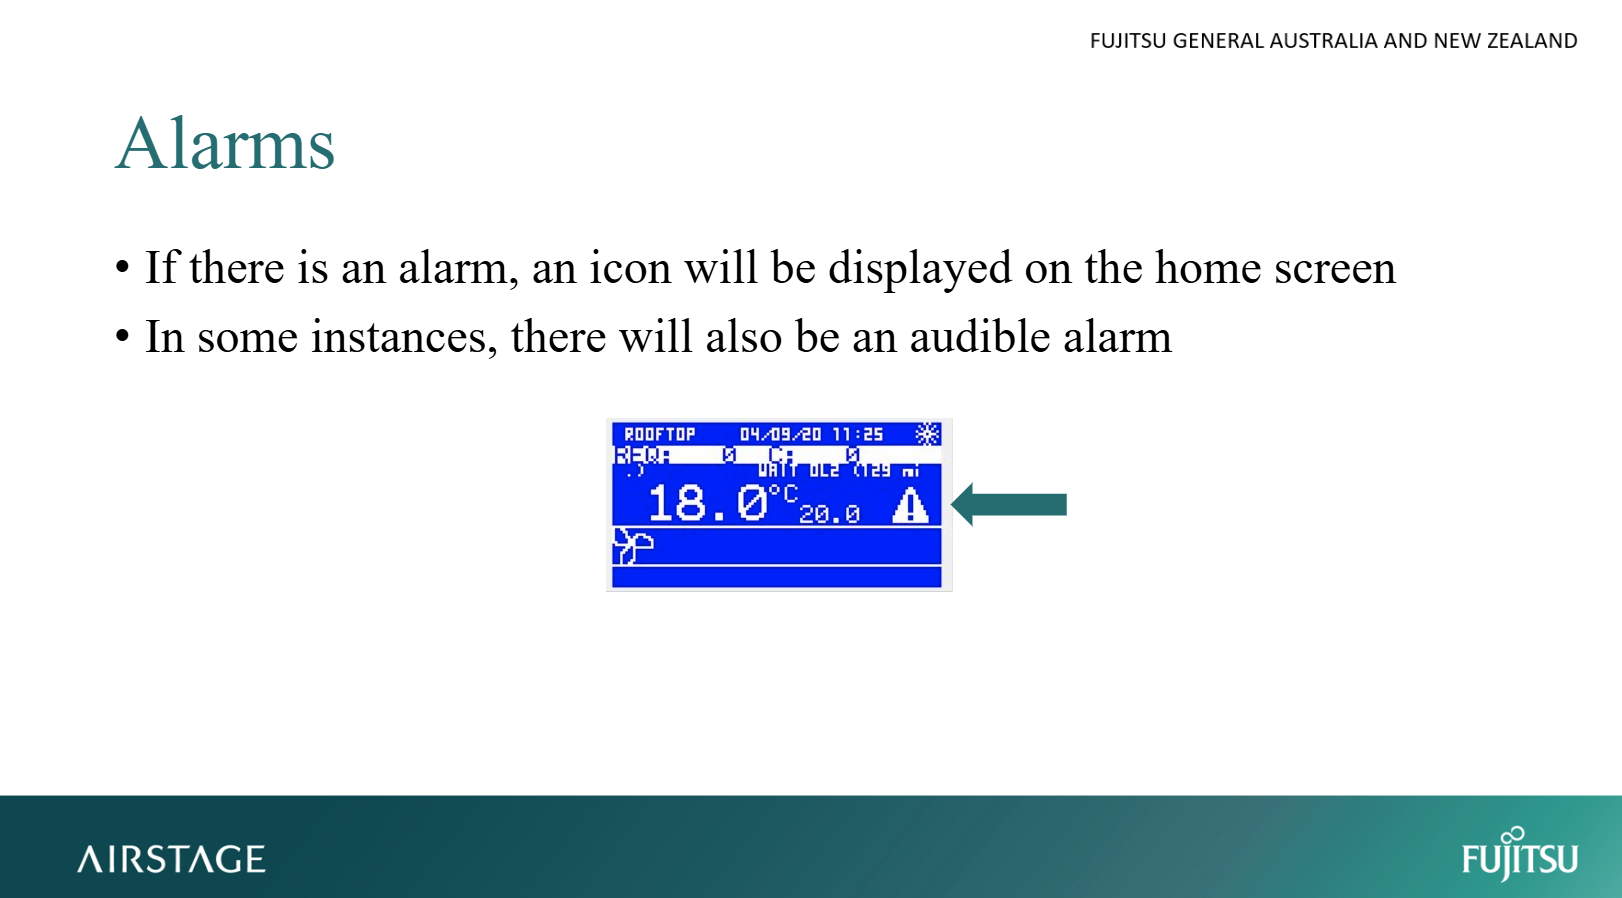
When a rooftop package unit enters a fault or alarm condition, an alarm triangle icon appears on the controller home screen. Depending on the fault type, an audible alarm may also sound.
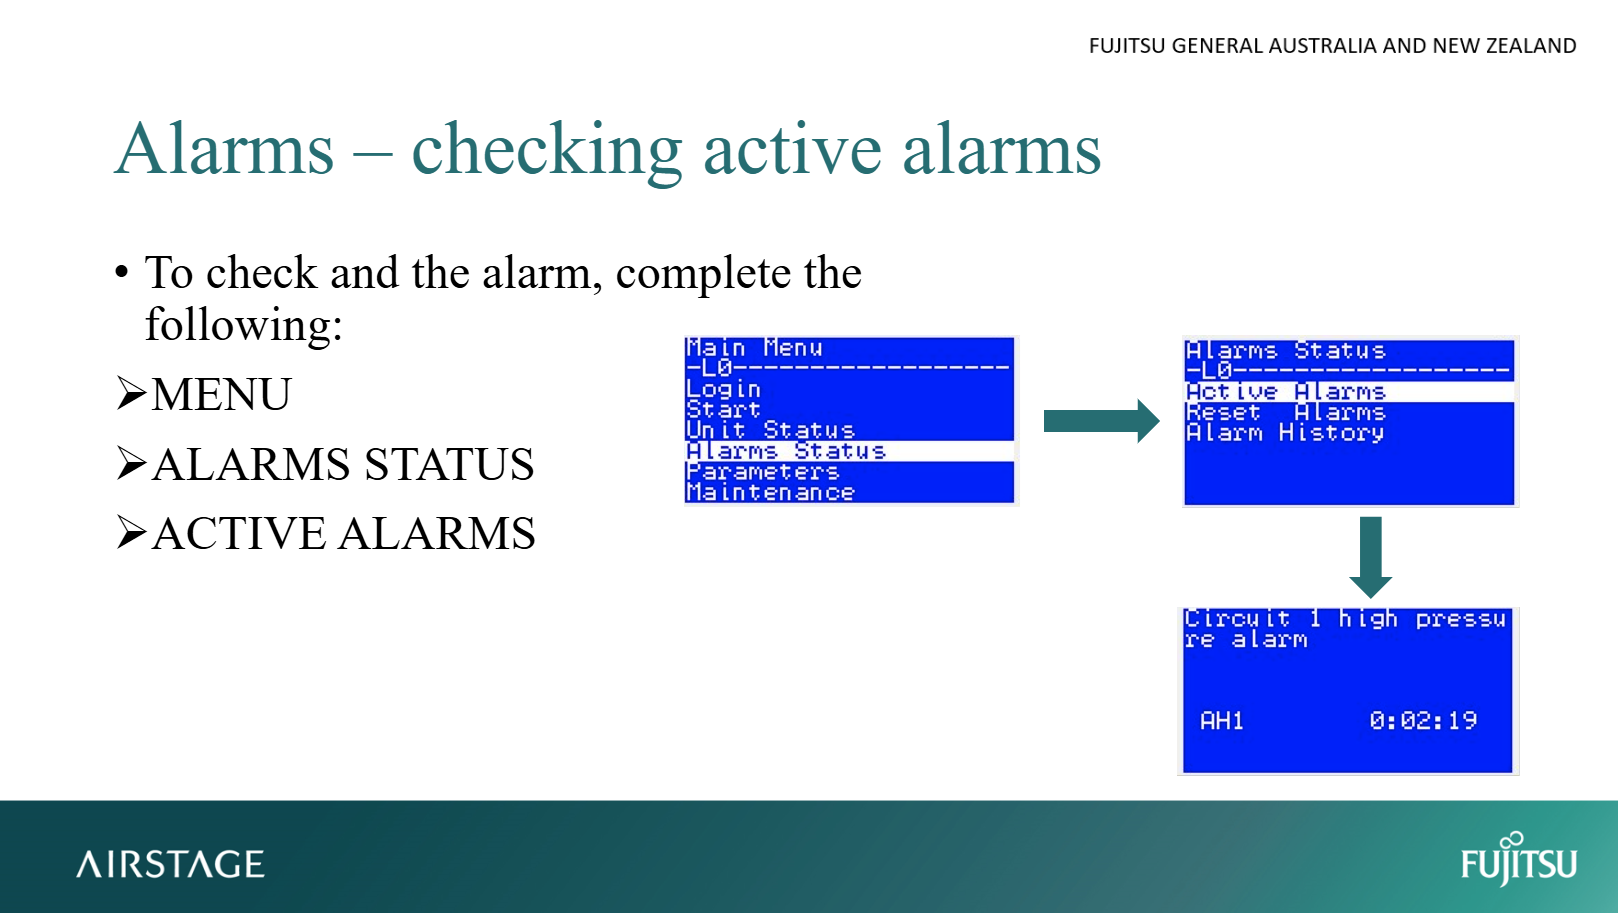
- Press MENU.
- Navigate to ALARM STATUS.
- Select ACTIVE ALARMS.
- Review the displayed alarm message.
- Record the alarm description and time occurred before resetting.
2. Checking Alarm History
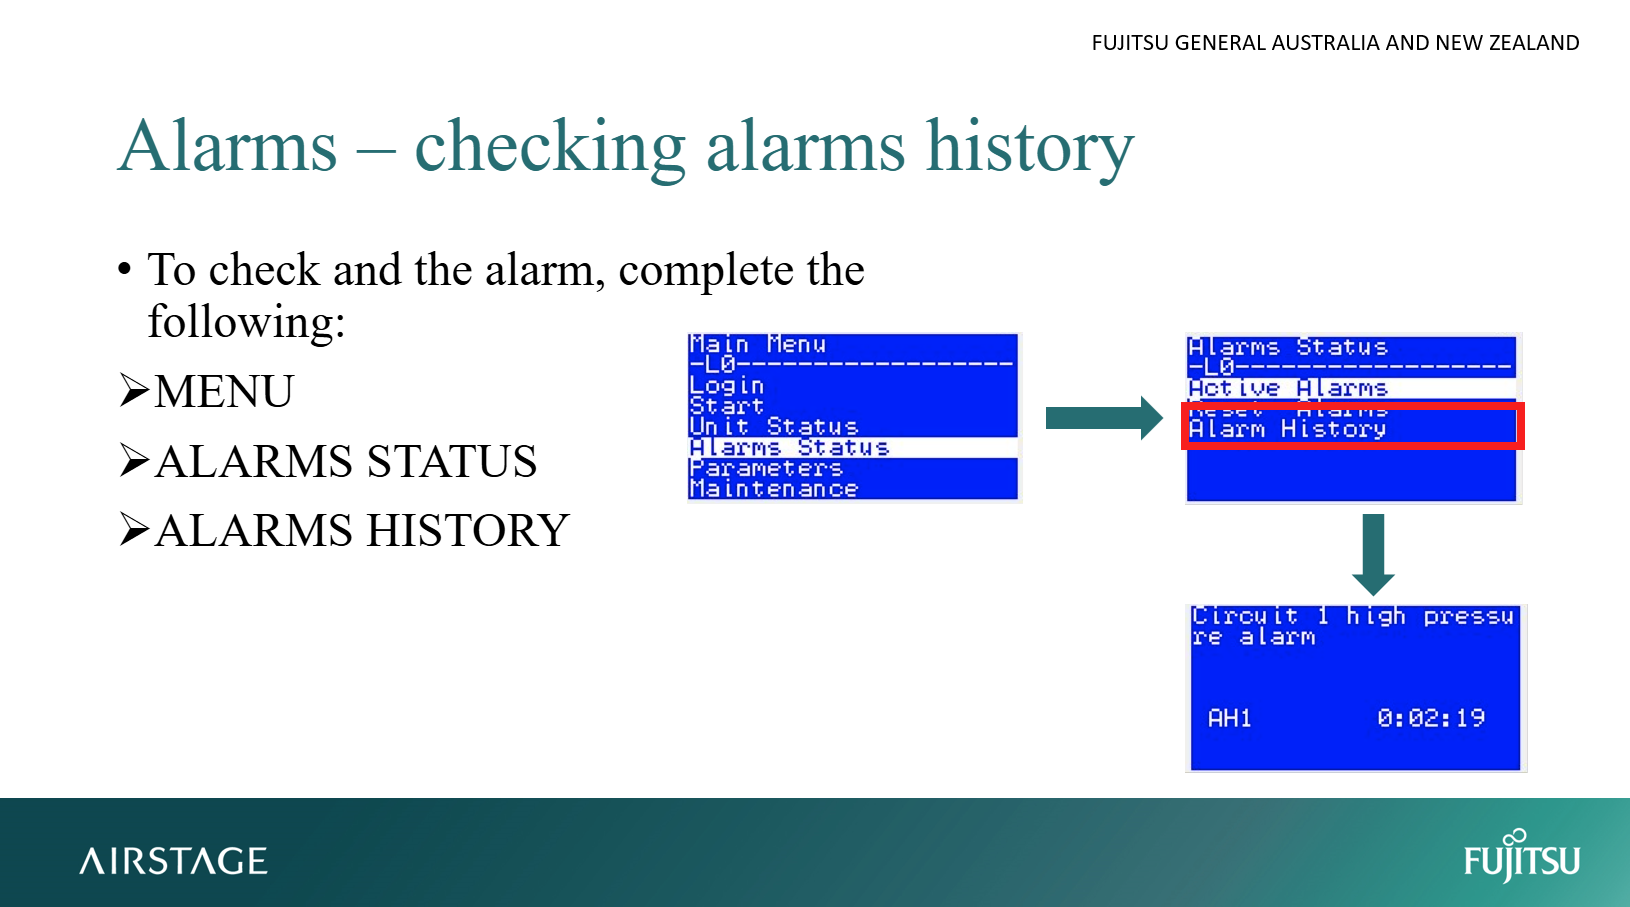
For recurring or intermittent faults, open MENU → ALARM STATUS → ALARM HISTORY. Previous alarms and timestamps can help identify recurring high-pressure cut-outs, airflow faults or communication issues.
3. Resetting the Alarm
Before resetting, confirm the cause of the alarm has been identified and the fault condition has been cleared. Examples include cleaning blocked filters, restoring fan operation, resetting pressure switches or repairing wiring faults.
Option 1 – Via Controller Menu
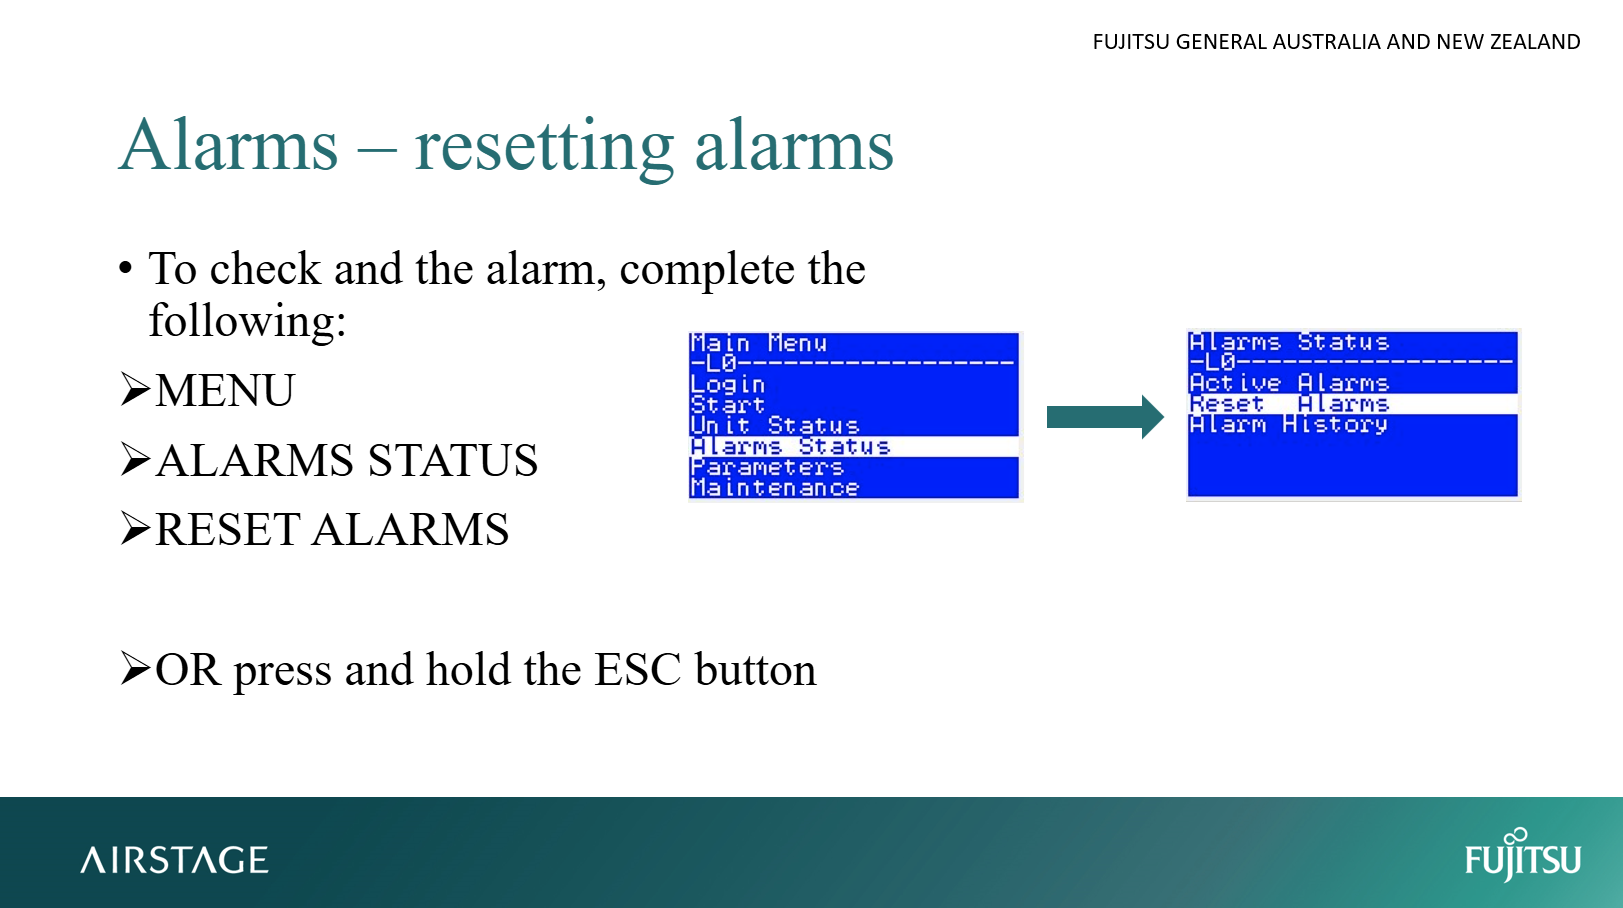
- Press MENU.
- Select ALARM STATUS.
- Select RESET ALARMS.
- Wait a few seconds for confirmation that the alarm has cleared.
Option 2 – Manual Reset
Press and hold the ESC button for approximately 5 seconds. If the fault has been resolved, the audible alarm and alarm icon should clear.
4. Post-Reset Check
- Return to the HOME screen.
- Confirm the alarm icon is no longer displayed.
- Verify normal operating values, including supply air temperature, compressor status, fan operation and return air temperature.
- If applicable, perform a Test Run to confirm stable operation.
5. Common Causes of Alarms
| Alarm Type | Probable Cause | Corrective Action |
|---|---|---|
| High Pressure | Blocked filters, fan failure, overcharge | Check airflow, condenser coil and refrigerant charge. |
| Low Pressure | Refrigerant leak, TXV fault, low airflow | Leak test and repair; verify suction pressure. |
| Fan Motor Alarm | Motor overload or sensor failure | Inspect fan motor, capacitor and controller output. |
| Temperature Sensor Error | Disconnected or damaged sensor | Test thermistor resistance and replace if open or shorted. |
| Communication Error | Wiring fault between controller and PCB | Check communication wiring integrity and polarity. |
6. Notes for Technicians
- Always record alarm details before clearing them.
- If faults persist, provide the model and serial number, alarm code or description, and site conditions such as ambient temperature and load state when escalating.
- Frequent resets without addressing the cause may lead to compressor or PCB damage.
7. Summary
- Access MENU → ALARM STATUS.
- Review ACTIVE ALARMS.
- Record the alarm and rectify the cause.
- Reset via RESET ALARMS or hold ESC for 5 seconds.
- Confirm the system returns to normal operation.
8. Reference Images