
AIRSTAGE Technical Reference
3-Wire Remote Signal Test
Power-supply and communication checks for Y1, Y2 and Y3 remote-controller circuits
For wall-mounted 3-wire remote controllers connected to compatible indoor units
The 3-wire remote signal test verifies the DC power supply and pulsed communication signal between the wall-mounted remote controller and the indoor unit.
Live low-voltage testing: Testing is conducted on an energised circuit of approximately 12 V DC. Use insulated multimeter probes and take care not to bridge or short adjacent terminals.
1. Testing conditions
- Ensure the wall controller and indoor unit are connected and powered.
- Use a digital multimeter capable of measuring DC voltage.
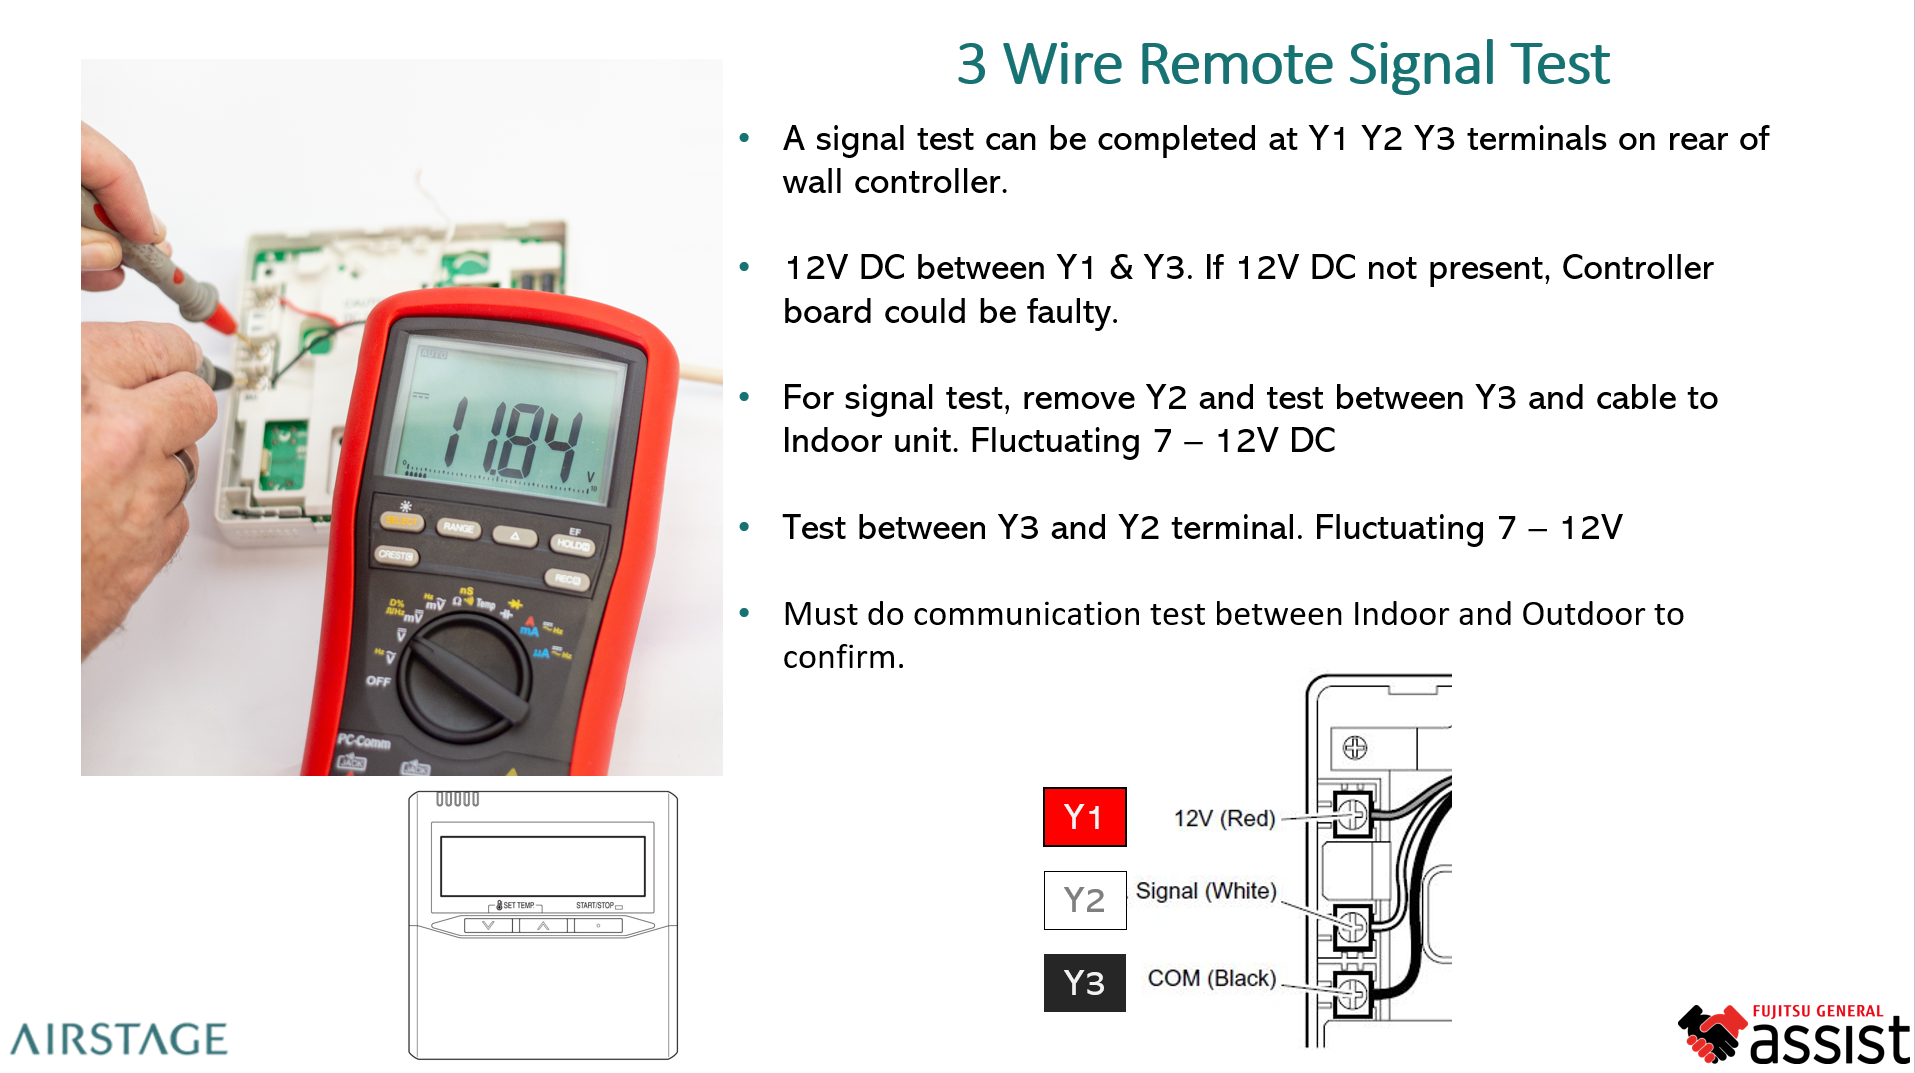
- Test at the Y1 (12 V), Y2 (signal) and Y3 (common) terminals on the rear of the remote controller.
2. Terminal identification
| Terminal | Wire colour | Function |
|---|---|---|
| Y1 | Red | +12 V DC power |
| Y2 | White | Signal line |
| Y3 | Black | Common (GND) |
3. Test procedure
Step 1 - Verify the DC power supply
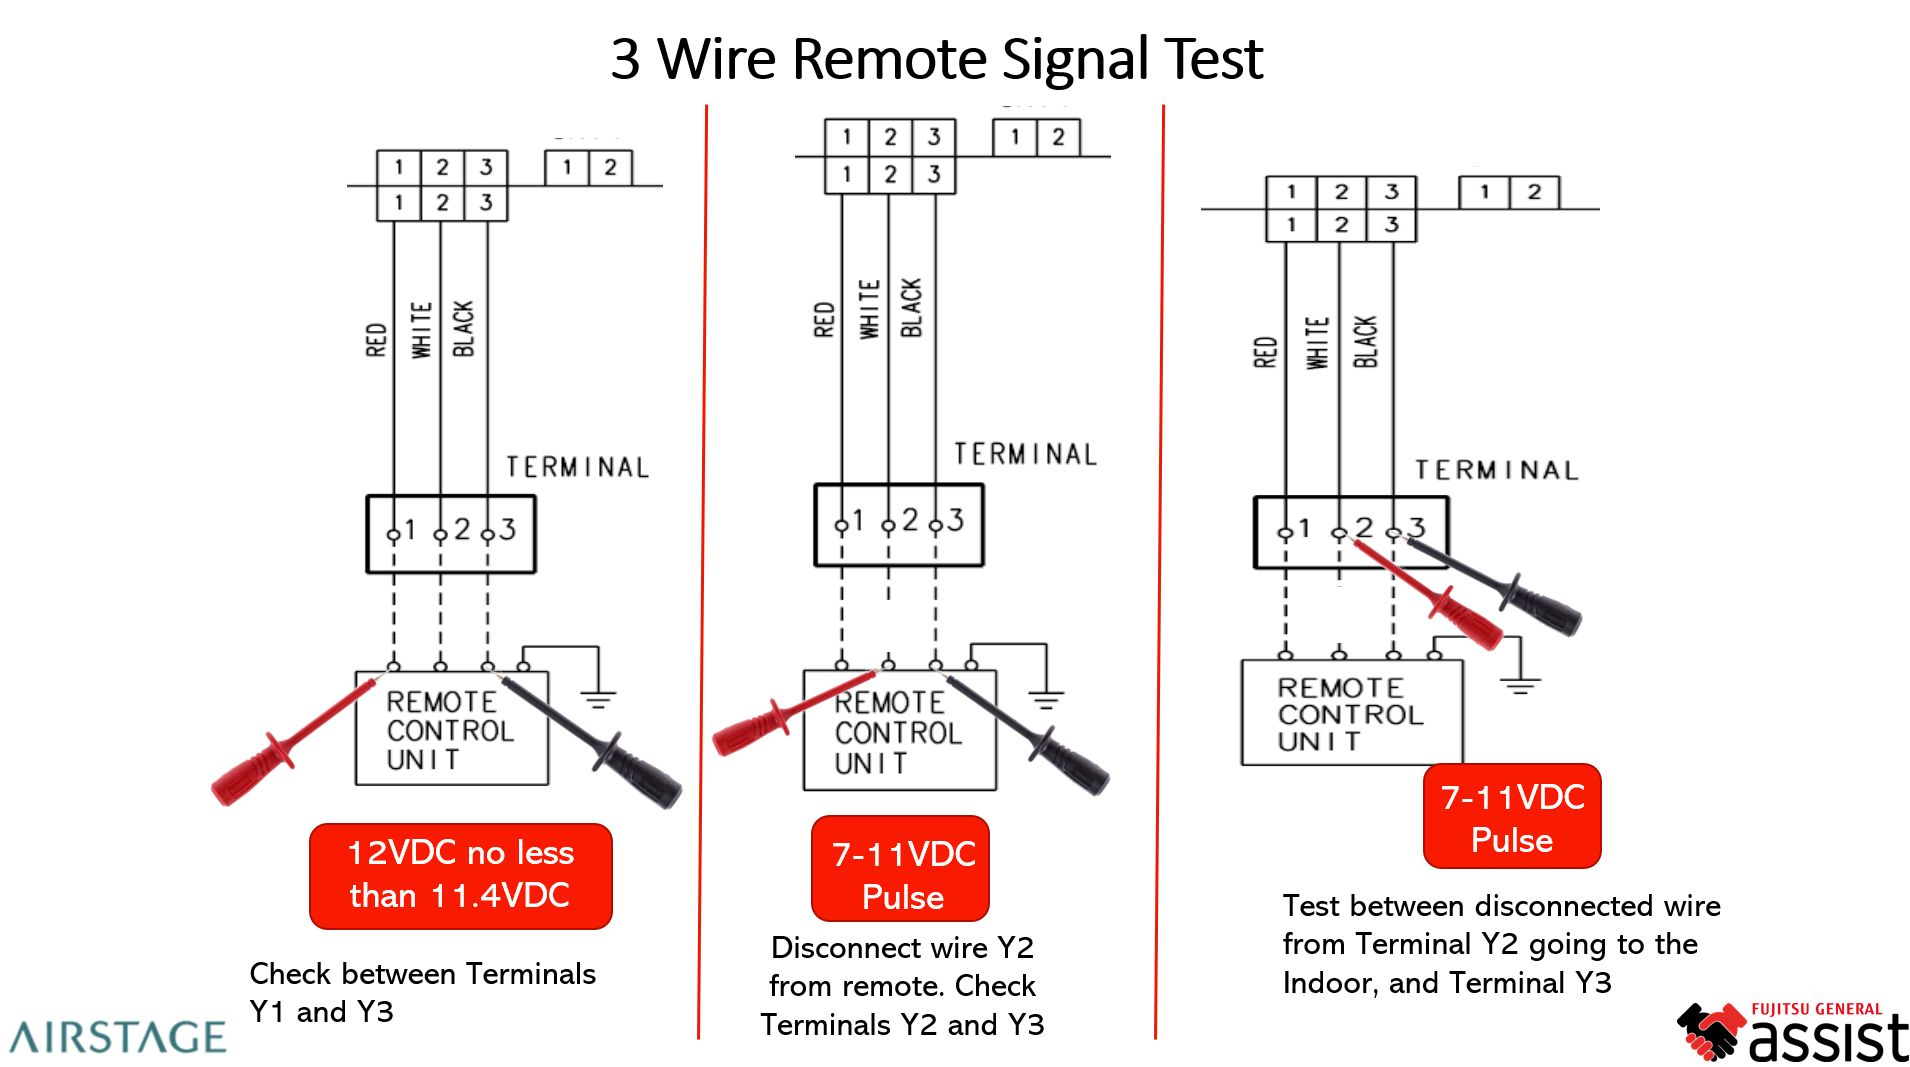
- Measure voltage between Y1 (red) and Y3 (black).
- Expected reading: 12 V DC, with a minimum acceptable value of 11.4 V DC.
- Where no voltage is present, investigate the controller PCB and its DC power supply.
Step 2 - Verify the signal output from the remote controller
- Disconnect the Y2 (white) signal wire from the terminal.
- Measure between Y2 (white) and Y3 (black) at the controller.
- Expected reading: 7-12 V DC fluctuating or pulsing, indicating active data transmission.
Step 3 - Verify the signal from the indoor unit
- With Y2 disconnected, measure between the Y3 (black) terminal and the Y2 wire leading to the indoor unit.
- Expected reading: 7-12 V DC fluctuating or pulsing.
- This confirms signal activity from the indoor PCB side of the circuit.
Step 4 - Confirm indoor-to-outdoor communication
Where all remote-controller signal readings are correct but the system still does not operate, verify communication between the indoor and outdoor units using the applicable service communication test procedure.
Important: Do not condemn a controller or indoor PCB from a single reading. Confirm supply voltage, wiring continuity, terminal condition and signal behaviour before replacing components.
4. Diagnosis and interpretation
| Observation | Diagnosis | Recommended action |
|---|---|---|
| 12 V DC present between Y1-Y3 | Power supply normal | Proceed with the signal test |
| No voltage between Y1-Y3 | Missing DC supply or controller-side fault | Check supply, wiring and controller PCB before replacement |
| 7-12 V fluctuating signal between Y2-Y3 | Signal circuit operating normally | No remote signal fault detected |
| No fluctuation on Y2-Y3 | Signal transmission fault | Check Y2 continuity, controller and indoor PCB |
| Signal correct but no system operation | Possible indoor-to-outdoor communication fault | Perform the applicable communication check |
5. Technical notes
- The 3-wire circuit uses a 12 V DC supply and a pulsed data signal.
- A fluctuating 7-12 V DC reading indicates active digital communication.
- A stable Y2 voltage with no fluctuation may indicate a stuck signal or controller fault.
- Where faults persist, test continuity and terminal integrity of the Y2 communication line.
- Wire colours and terminal arrangements should always be confirmed against the applicable model documentation before testing.
6. Reference diagrams
Technical reference only. Always follow the applicable service manual, electrical safety requirements and model-specific wiring information.