
AIRSTAGE Technical Reference
Bridge Rectifier Testing
Diode-mode and live-voltage checks for single-phase and three-phase systems
Use this procedure to confirm diode integrity, AC supply conditions and DC bus output.
Overview: The bridge rectifier, also called a diode module, converts AC input voltage to DC voltage for the inverter circuit. Testing confirms correct AC-to-DC conversion in both single-phase and three-phase systems.
High-voltage hazard: Resistance and diode tests must only be completed with power fully isolated. Live-voltage testing must only be carried out by appropriately qualified personnel using suitable test equipment and safe working procedures.
1. Testing overview
Testing may be performed under two conditions:
| Test condition | Purpose |
|---|---|
| Power off - diode mode | Verifies the internal diode paths within the rectifier. |
| Power on - voltage measurement | Confirms the AC input supply and DC output voltage. |
2. Power off test - diode mode
Tools required
- Digital multimeter with diode-test mode.
Procedure
- Disconnect power and all control harnesses connected to the rectifier circuit.
- Set the multimeter to diode-test mode.
- Measure between the specified terminals using the lead positions shown in the applicable table.
- Compare the readings with the expected values. A normal individual diode voltage drop is approximately 0.4 V.
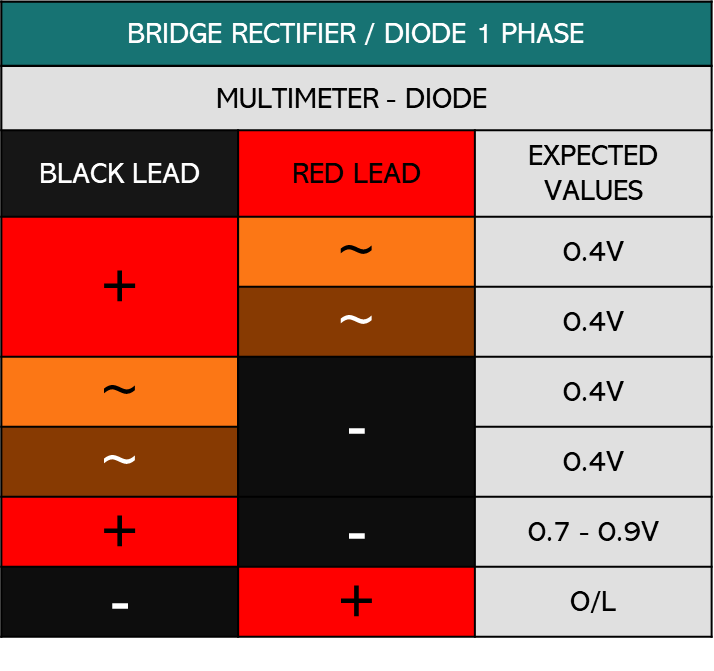
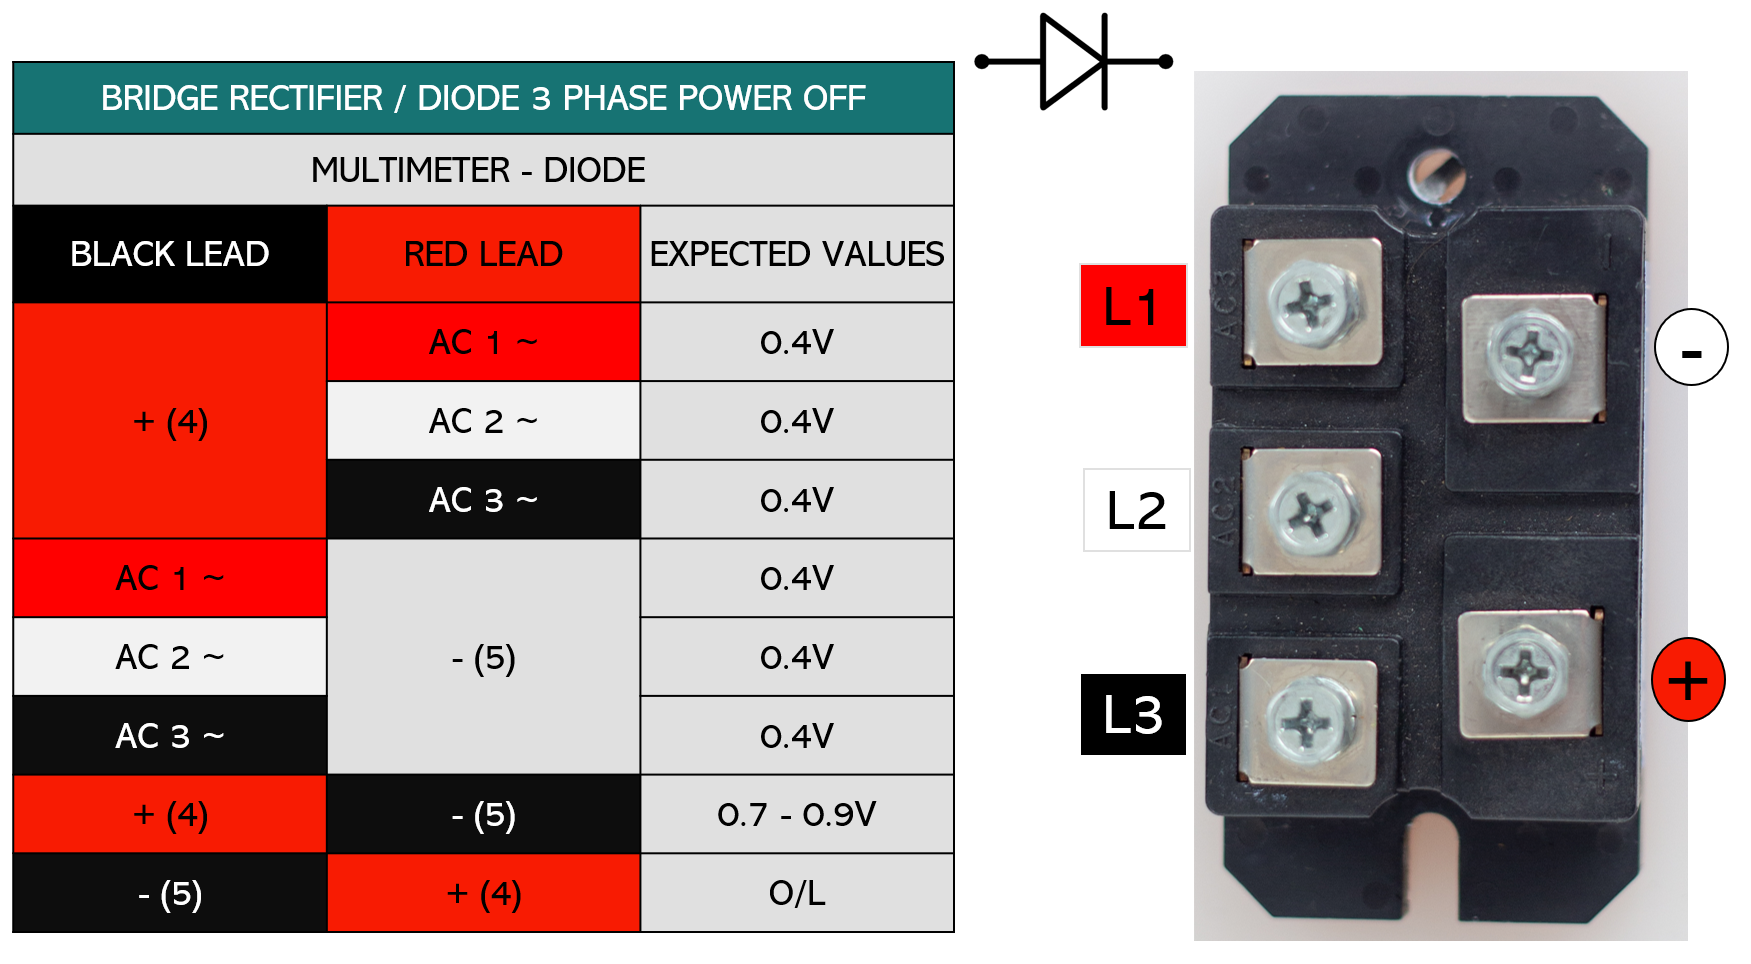
Meter-lead convention: The tables below separate the black-lead terminal, red-lead terminal and expected reading. Do not interpret the arrow symbols in the original diagram as a substitute for confirming the actual lead positions.
3. Single-phase bridge rectifier test
| Black lead | Red lead | Expected value |
|---|---|---|
| + | AC input ~ 1 | Approx. 0.4 V |
| + | AC input ~ 2 | Approx. 0.4 V |
| AC input ~ 1 | - | Approx. 0.4 V |
| AC input ~ 2 | - | Approx. 0.4 V |
| + | - | 0.7-0.9 V |
| - | + | O/L |
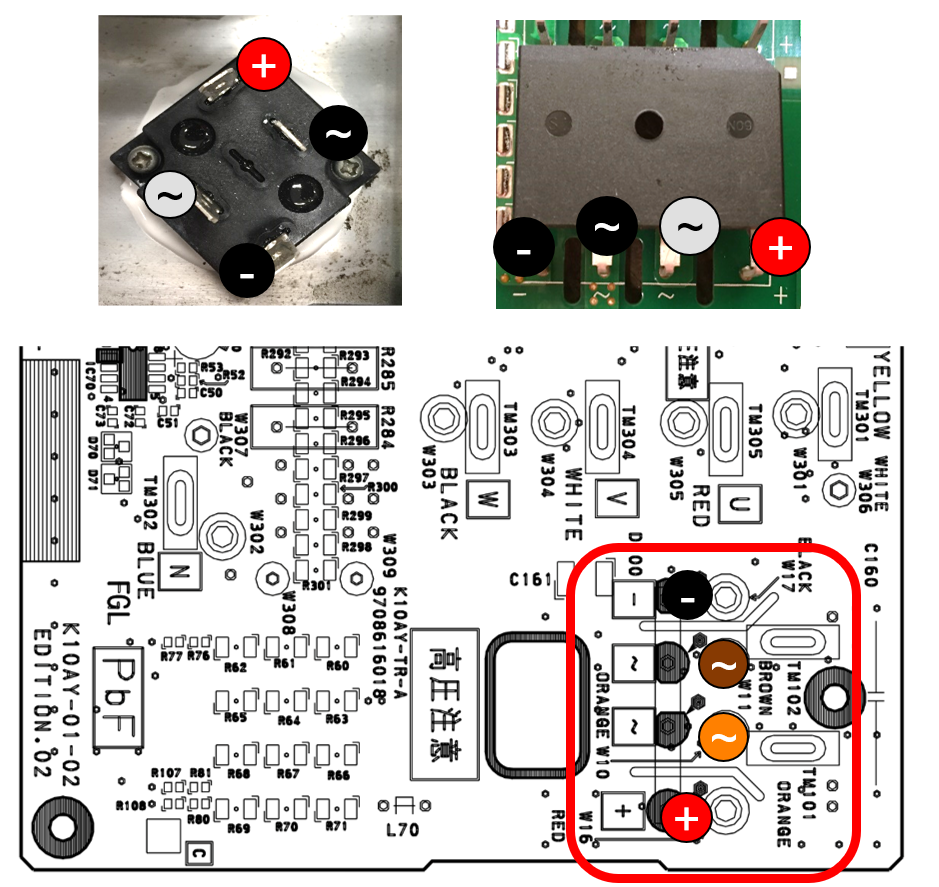
Terminal reference: + is the positive DC output, - is the negative DC output, and the two ~ terminals are the AC input lines.
4. Three-phase bridge rectifier test
| Black lead | Red lead | Expected value |
|---|---|---|
| + | AC1~ | Approx. 0.4 V |
| + | AC2~ | Approx. 0.4 V |
| + | AC3~ | Approx. 0.4 V |
| AC1~ | - | Approx. 0.4 V |
| AC2~ | - | Approx. 0.4 V |
| AC3~ | - | Approx. 0.4 V |
| + | - | 0.7-0.9 V |
| - | + | O/L |
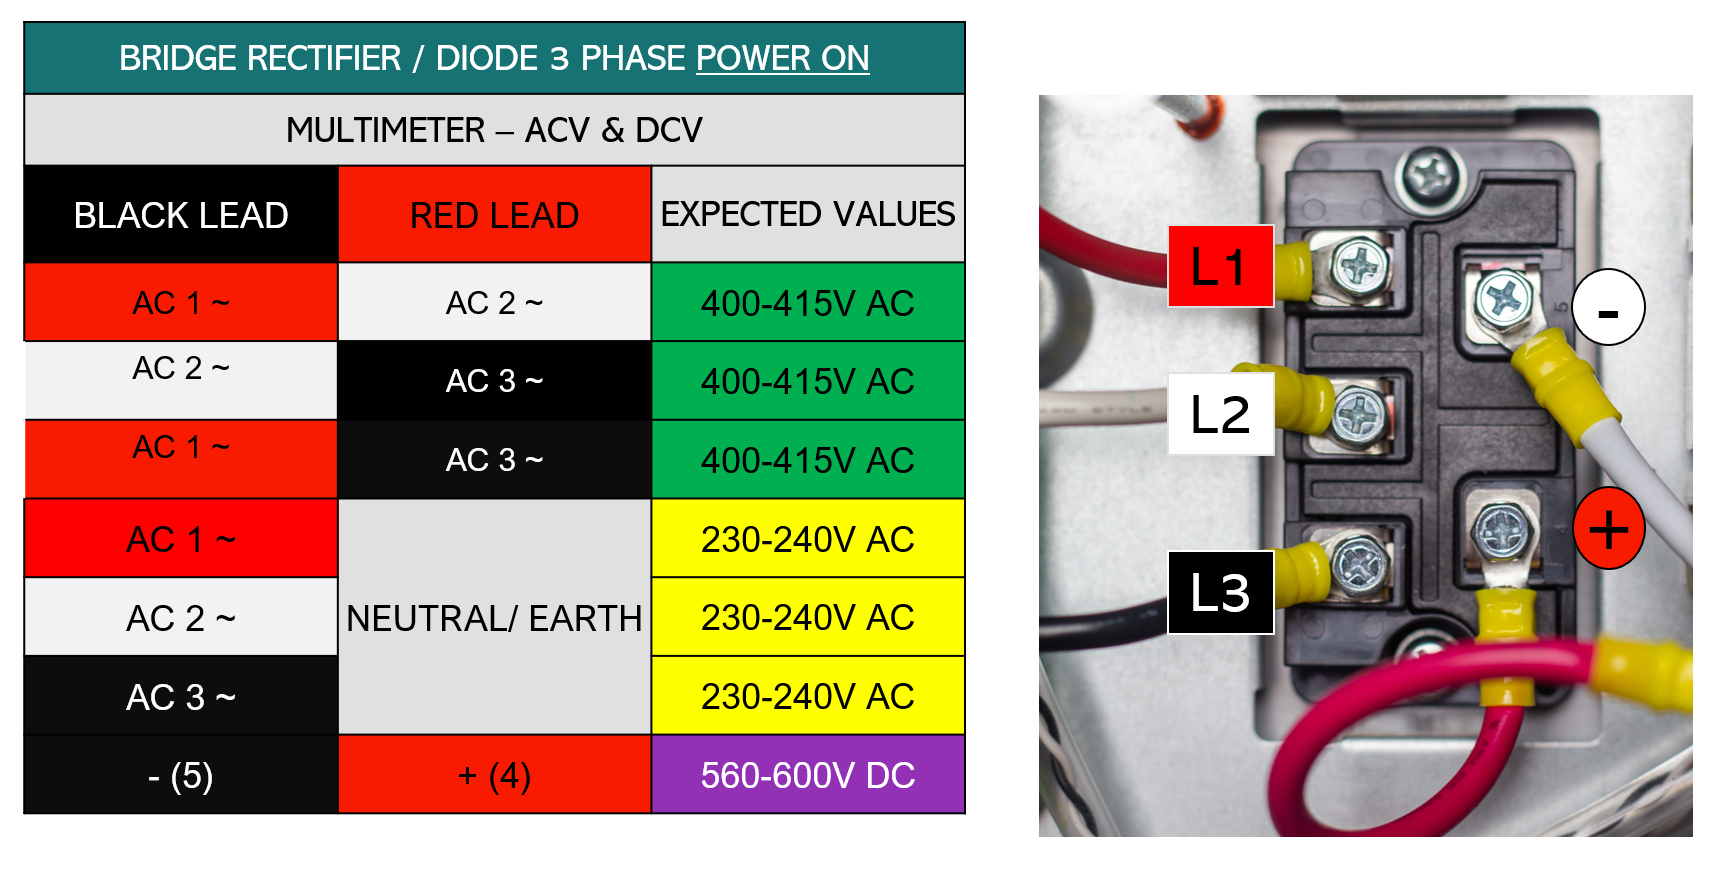
Terminal reference: AC1~, AC2~ and AC3~ are the three AC input phases; + and - are the positive and negative DC outputs.
5. Power on test - voltage measurement
Live testing: The following checks involve hazardous voltages. Confirm the meter category, lead condition, safe access and appropriate personal protective equipment before proceeding.
Tools required
- Digital multimeter with suitable AC and DC voltage ranges.
Procedure
- Reconnect AC power.
- Measure the applicable phase-to-phase, phase-to-neutral and DC output voltages.
| Measurement | Expected value |
|---|---|
| AC1~ to AC2~ | 400-415 V AC |
| AC2~ to AC3~ | 400-415 V AC |
| AC1~ to AC3~ | 400-415 V AC |
| AC1~ to neutral | 230-240 V AC |
| AC2~ to neutral | 230-240 V AC |
| AC3~ to neutral | 230-240 V AC |
| DC negative (-) to DC positive (+) | 560-600 V DC |
6. Diagnosis and interpretation
| Observation | Likely diagnosis | Recommended action |
|---|---|---|
| All readings are normal | Rectifier operating correctly | No rectifier action required. |
| 0 V or inconsistent diode readings | Internal short | Replace the bridge rectifier. |
| O/L in all directions | Open circuit | Replace the bridge rectifier. |
| Low DC output during live testing | Faulty rectifier or smoothing capacitor | Check the smoothing capacitor and DC bus. |
| No AC input voltage | Supply or fuse issue | Check the upstream power supply, protective devices and wiring. |
7. Technical notes
- Always verify the smoothing capacitor after rectifier replacement.
- Confirm all wiring connections are tight and free from corrosion.
- For three-phase units, confirm the AC supply is balanced before completing the diagnosis.
- A shorted rectifier may cause an input fuse to fail or a circuit breaker to trip.
8. Reference images
The following source images are retained for component and terminal identification.
Important: Expected voltages are reference values from the source material. Confirm the applicable product service documentation and local electrical requirements before replacing components or completing live testing.