
General Assist Technical Reference
How to Initialise a WLAN Adaptor KMCB
FGLair Wi-Fi setup for built-in and external WLAN adaptors
Use this procedure before first-time pairing or when connecting the air conditioner to a different router or FGLair account.
Initialising the WLAN adaptor clears its saved wireless network details and returns it to setup mode. The air conditioner can then be added again through the FGLair app.
Before starting: Make sure the indoor unit remains powered throughout the process. Initialisation removes the saved Wi-Fi network name and password from the adaptor.
1. Applicable WLAN adaptor types
This procedure applies to both of the following:
| Adaptor type | Location of the Setting button |
|---|---|
| Built-in WLAN adaptor | On the indoor unit front panel, near the wireless LAN indicator lights. |
| External WLAN adaptor | On the face of the plug-in WLAN adaptor. |
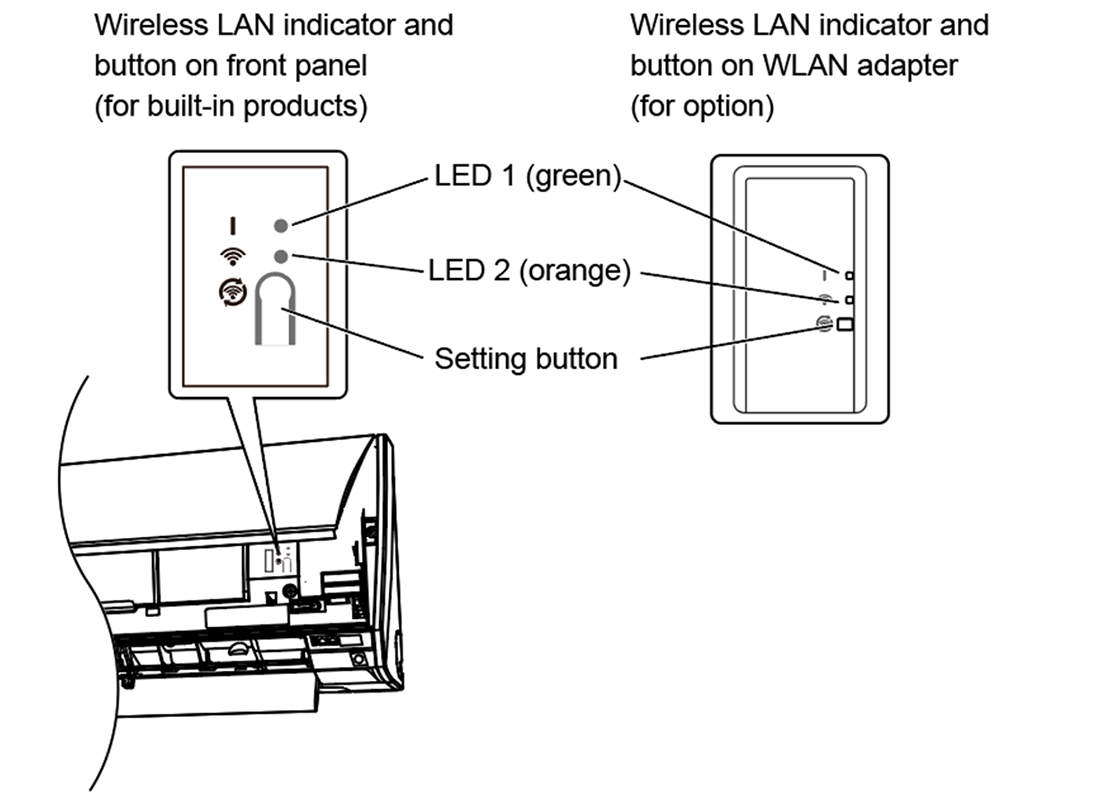
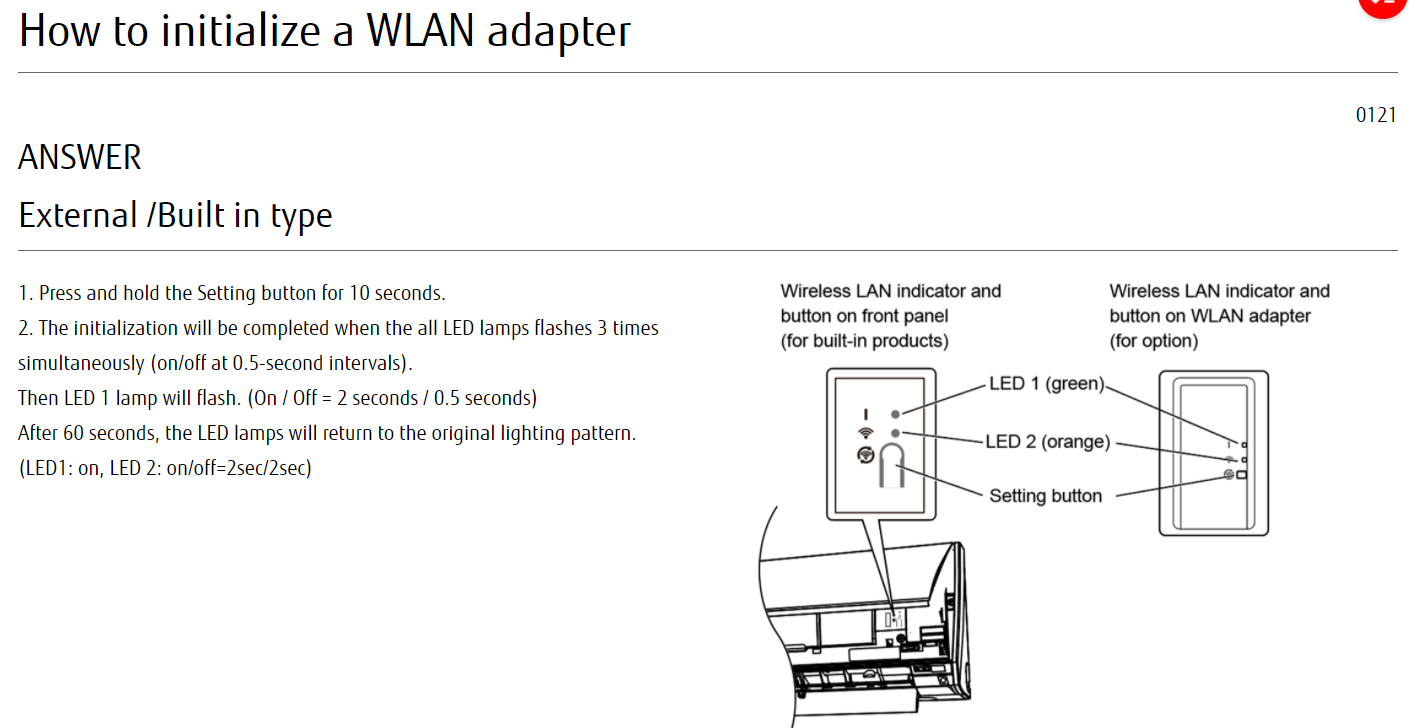
LED 1 is green, LED 2 is orange, and the Setting button is located below the indicators.
2. Initialise the WLAN adaptor
| Step | Action | What you should see |
|---|---|---|
| 1 | Press and hold the Setting button for 10 seconds. | Keep holding until the initialisation LED sequence begins. |
| 2 | Release the button when both LEDs flash together. | All LED lamps flash three times simultaneously at approximately 0.5-second intervals. |
| 3 | Allow the adaptor to complete the reset. | LED 1 (green) flashes: 2 seconds on and 0.5 seconds off. |
| 4 | Wait approximately 60 seconds. | The LEDs return to their normal setup pattern. |
3. LED sequence and meaning
| Stage | LED indication | Meaning |
|---|---|---|
| Initialisation accepted | Both LEDs flash together three times. | The adaptor has accepted the reset command. |
| Reset processing | LED 1 green: 2 seconds on / 0.5 seconds off. | The adaptor is clearing its previous WLAN settings. |
| Setup-ready pattern | LED 1 green: on. LED 2 orange: approximately 2 seconds on / 2 seconds off. | Initialisation is complete and the adaptor is ready for Wi-Fi setup. |
Successful result: Once the setup-ready LED pattern appears, proceed to the FGLair app and add the air conditioner as a new device.
4. Reconnect using the FGLair app
- Open the FGLair app.
- Select the option to add or register a new air conditioner.
- Follow the in-app setup instructions.
- Select the required Wi-Fi network and enter its password when prompted.
- Allow the app and WLAN adaptor time to complete registration.
Wi-Fi requirement: FGLair WLAN adaptors generally require a compatible 2.4 GHz wireless network. Confirm the router settings if the network is not displayed during setup.
5. Troubleshooting
| Symptom | Likely cause | Action |
|---|---|---|
| The LEDs do not flash after holding the button | The button was released too early or was not fully pressed. | Press and hold the Setting button continuously for at least 10 seconds. |
| Both LEDs remain off | The adaptor or indoor unit may not have power. | Confirm the indoor unit is powered. For an external adaptor, also confirm its plug and cable connection. |
| The expected setup-ready pattern does not appear | The initialisation may not have completed correctly. | Wait at least 60 seconds, then repeat the procedure without interrupting power. |
| The adaptor is not found in the app | The adaptor may not be in setup mode, or the phone/router settings may be unsuitable. | Confirm the LED pattern, use a compatible 2.4 GHz network, remain close to the indoor unit, and restart the app setup process. |
6. Quick reference
Initialisation sequence
Hold Setting for 10 seconds → both LEDs flash together three times → LED 1 flashes 2 seconds on / 0.5 seconds off → wait 60 seconds → reconnect through FGLair.
Assist Technical Support
Australia: 1300 364 484
New Zealand: +64 4 568 8761
